This page will guide you through the setup process on a Sony Playstation 3 console.Note , ideally you will need to use a computer to register your IP on our network.
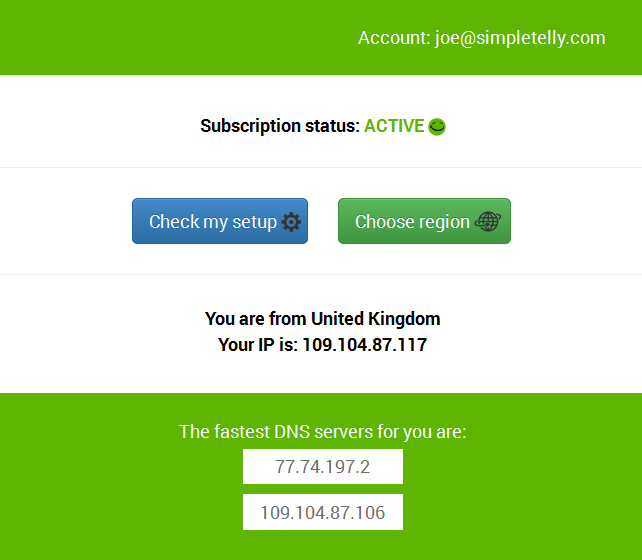
Login to our website, www.simpletelly.com from a computer on the same network as your PS3.
Take note of the fastest DNS server address that appears on screen.
Now, click on Check My Setup.
If this is the first device you have setup from this location, you will probably need to register your current IP address. Click on Register your new IP address.
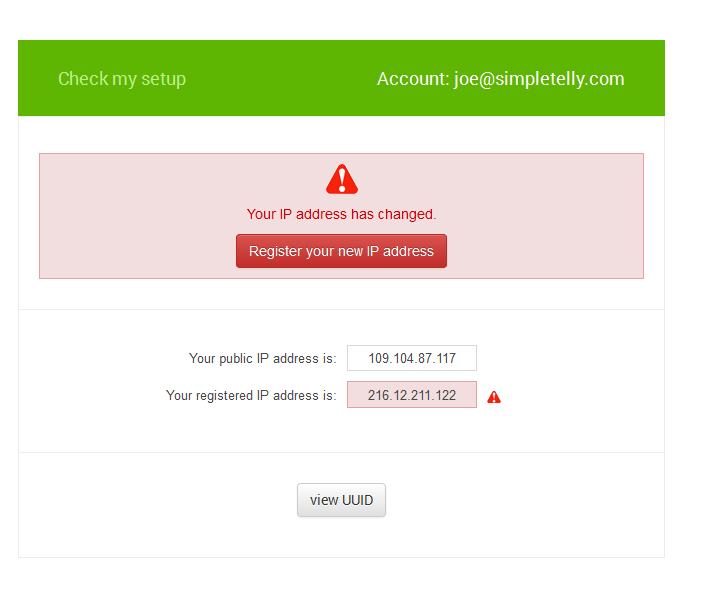
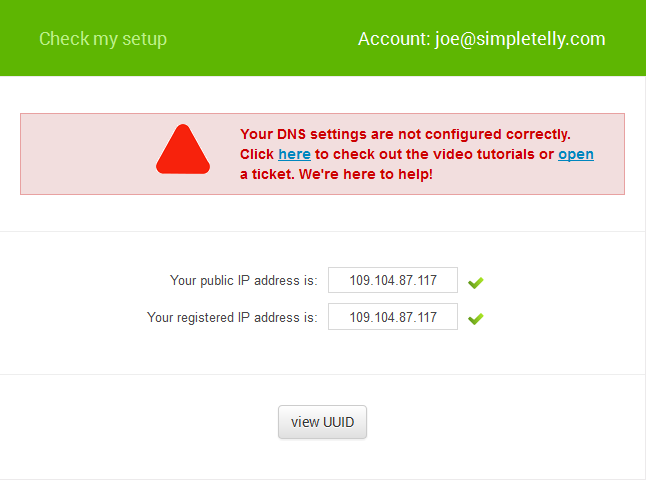
If the registration is done from a computer browser rather than using the console's browser, you will get this error on screen. You can disregard this as the DNS is set up on the console and you just need to ensure that the Registered IP address is the same as your Public IP address.
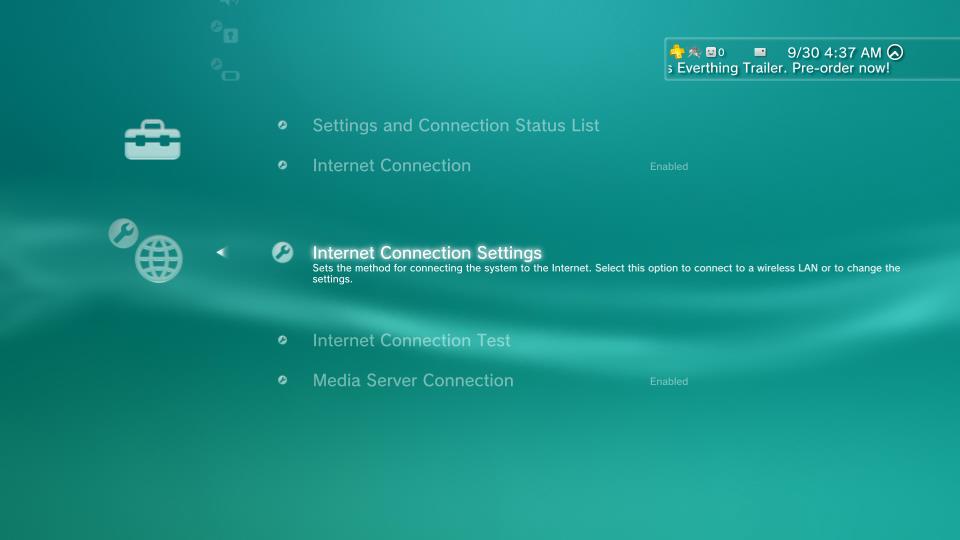
From your PS3 homescreen, go to Settings > Network Settings.

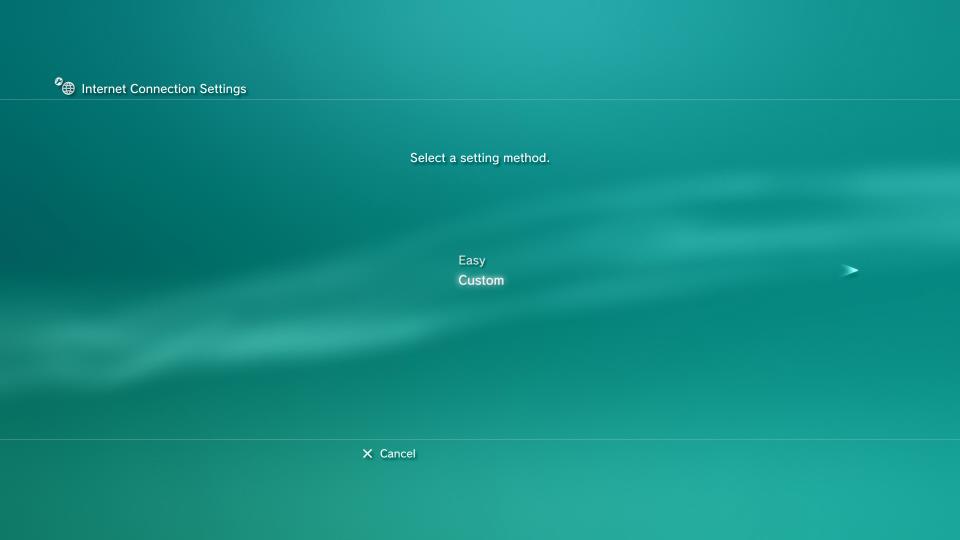
Scroll down and select Internet Connection Settings.
Select Custom for the settings method.
Now select your connection method, Wired or Wireless.
Note: If you are connecting wirelessly, you have to select your WiFi network and enter the password before you can proceed.

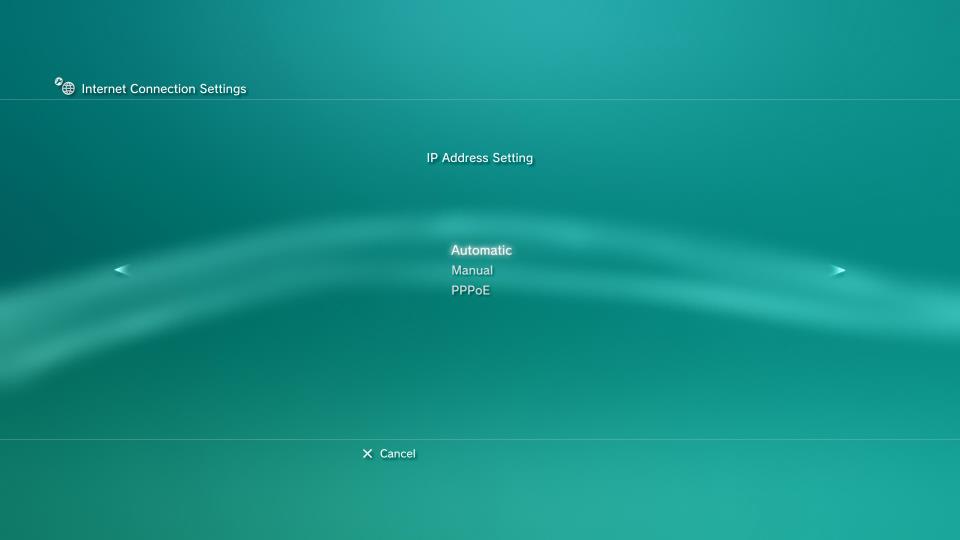
Leave your IP Address Setting at Automatic.
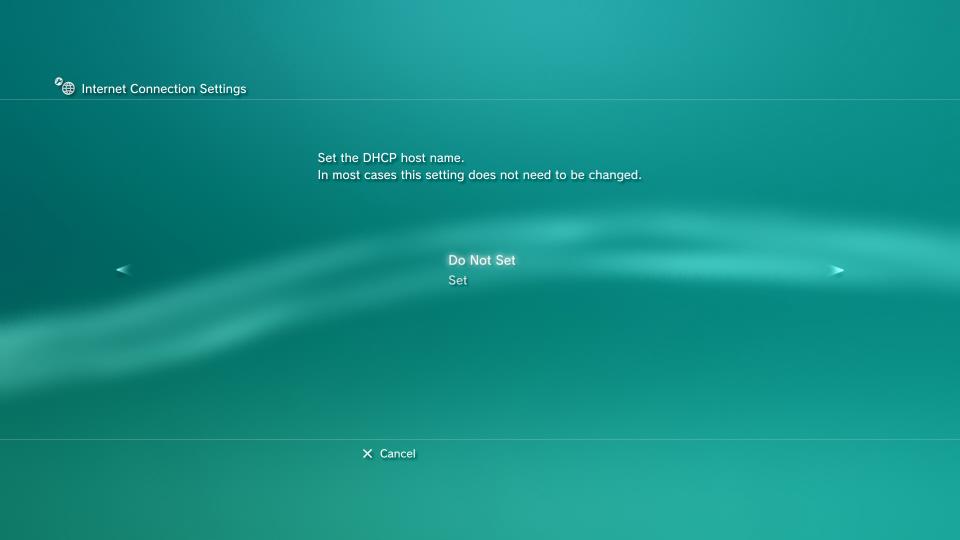
For DHCP, select the 'Do Not Set' option.
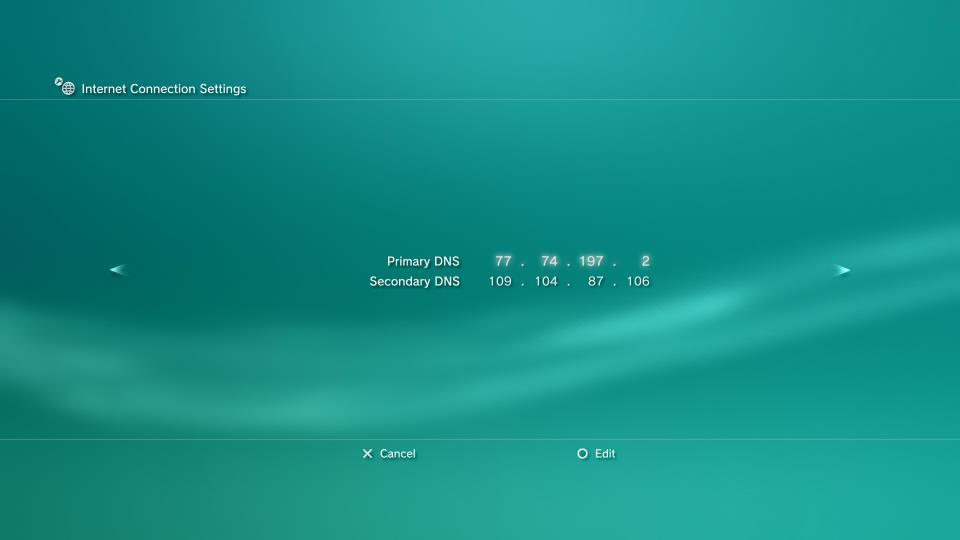
By default, the DNS should be Automatic. Change this to Manual.
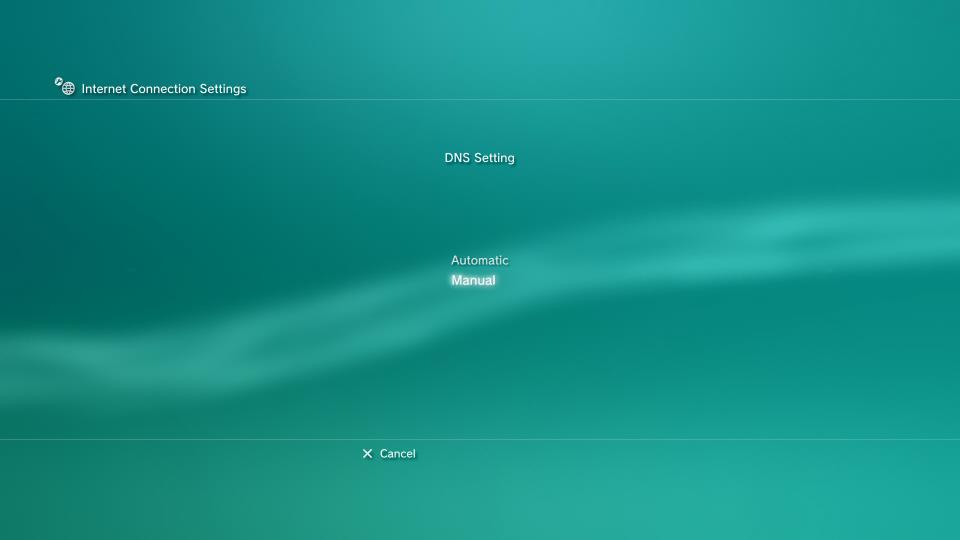
Enter the DNS server addresses that appeared on your browser earlier and click Next.
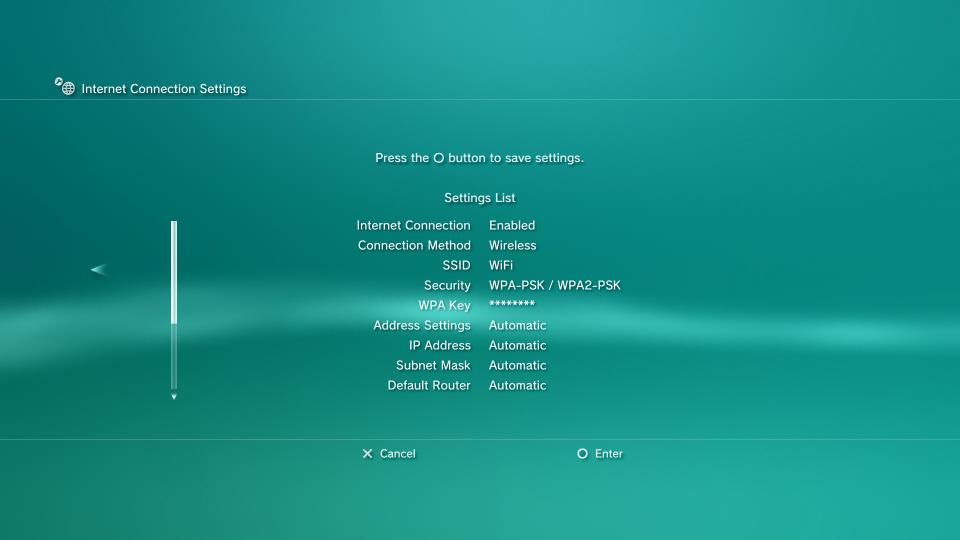
Now, scroll all the way to right without making any other changes to your connection until you are prompted to save the settings.
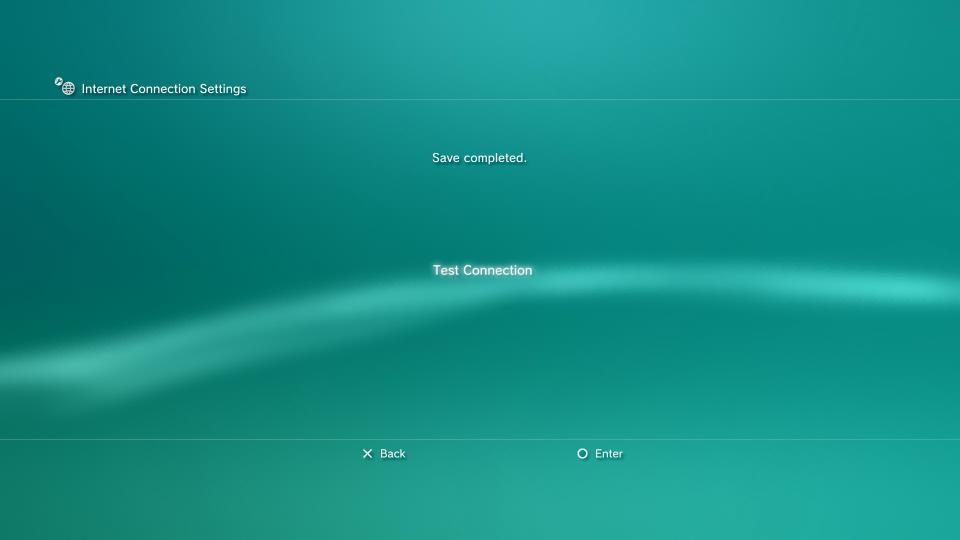
Select Test Connection.
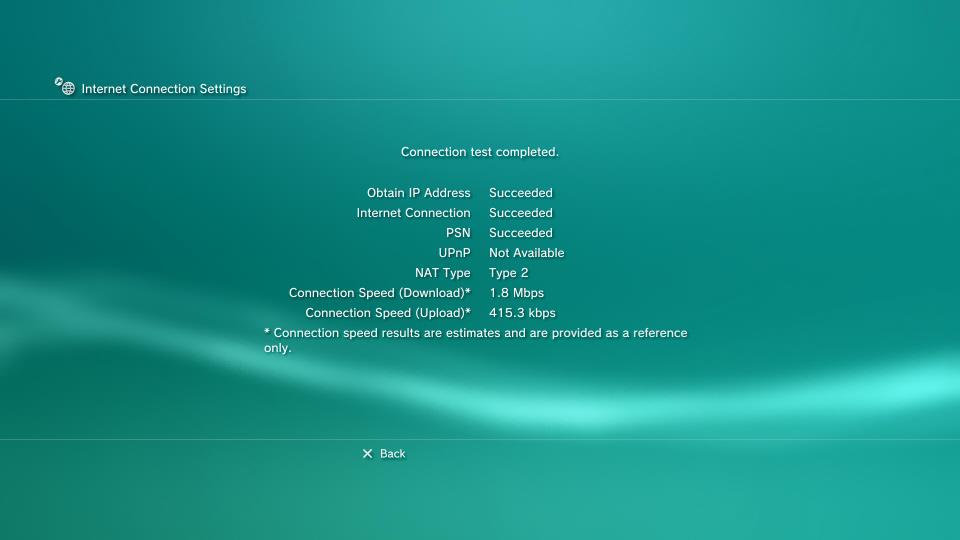
If the test is successful, you will see the following screen that indicates you're connected to the Internet.
Now that you have setup and registered your system you can go ahead and access the TV site of your choice and stream it like you mean it!.
For the full list of supported channels, please refer to our Supported Services page.
Unfortunately it doesn't always go to plan! If you are having problems please email us at support@simpletelly.com and we will do our best to assist you.