Unfortunately, certain devices such as the Google Chromecast have built in DNS settings designed to redirect all DNS queries to a particular server. To circumvent this, we'll need to set up a firewall on your router that will instead push all DNS queries to use SimpleTelly DNS.
While many routers in the market allow you to set up manual DNS servers on them, unfortunately many don't allow you to set up a custom firewall.
From our experience, the best routers that give you full customisation are DDWRT and RouterOS based routers. This guide will walk you through setting up a Mikrotik router that runs on RouterOS to use a firewall to restrict all outgoing DNS queries and push them to use SimpleTelly DNS servers instead.
Note: This method is now required in order for Netflix on Roku to work with our service.
First of all, login to your Mikrotik router user interface by entering its IP address into your browser.
Note: The default username is admin and there is no password.
The below instructions were done on the browser Webfig interface , the instructions will differ slightly if you are using the Winbox interface but the principal are the same.
Once you've gained access to the router interface, click on IP and then strong>Firewall which can be found on the left hand pane.
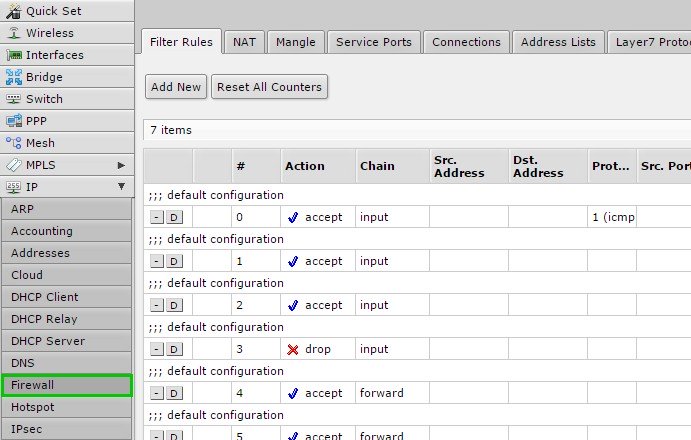
Once you've opened the Firewall menu, click on the NAT tab.
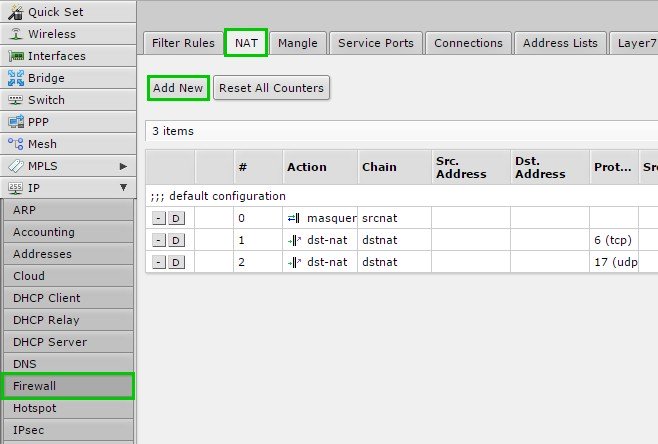
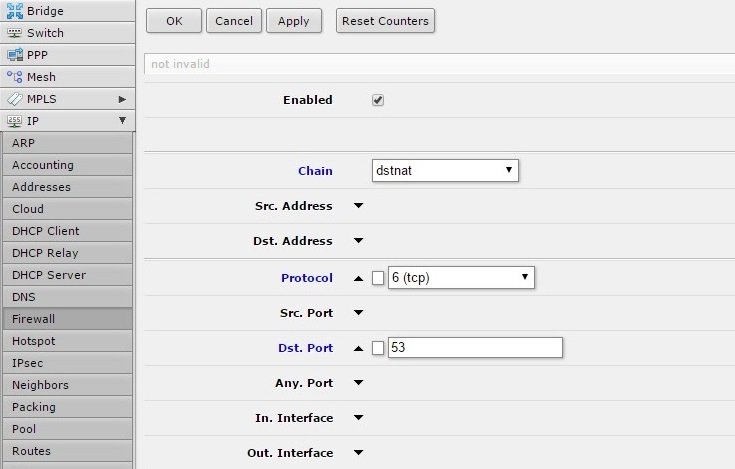
Click on Add New and change the settings from the drop down menu as below:
------------------------Chain : dstnat
Protocol : 6 (tcp)
Dst. Port : 53
------------------------
Scroll down and change the Action to dst-nat . This will give you further option to change as below:
------------------------To Addresses : the first DNS address that is recommended for you
To Ports : 53
------------------------
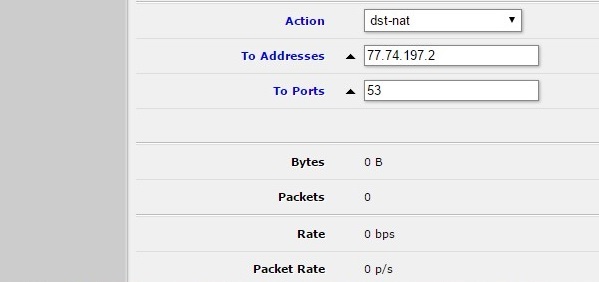
Note: The IP address that are used are only an example, please use the DNS addresses that you took note earlier from our website.
Once these settings have been entered, please click on Apply and OK which can be found on the top of the screen.
When you're returned to the NAT screen, please click on Add New to add another set of rules to the router, with the settings as below:
------------------------Chain : dstnat
Protocol : 17(udp)
Dst. Port : 53
------------------------
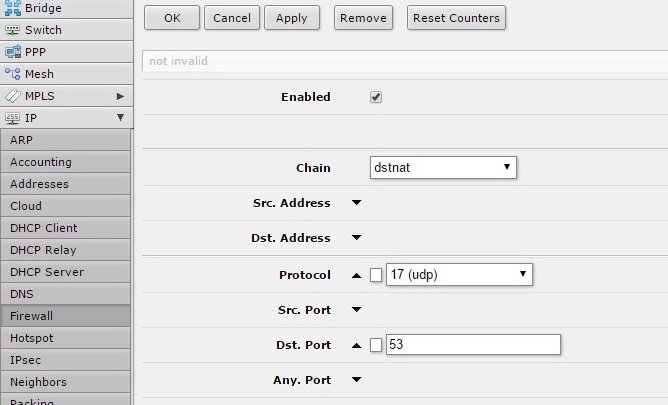
Scroll down and change the Action to dst-nat . This will give you further option to change as below:
------------------------To Addresses : the second DNS address that is recommended for you
To Ports : 53
------------------------
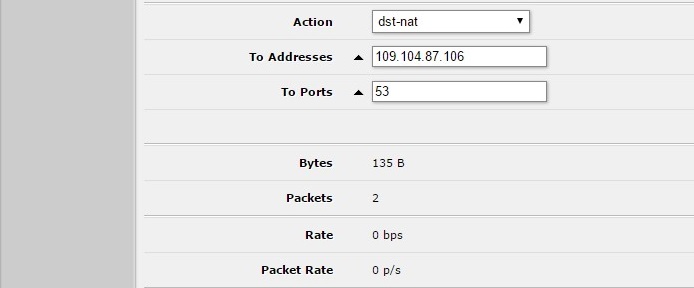
Note: The IP address that are used are only an example, please use the DNS addresses that you took note earlier from our website.
As before, please click on Apply and OK once everything has been entered.
Note: Generally, the changes on Mikrotik are usually instantaneous so you don't need to reboot your router, but in case you are having errors with the DNS settings, please reboot before attempting anything else.
Now that you have set up your router and registered your IP address you can go ahead and access the TV site of your choice and stream it like you mean it!
For the full list of supported channels, please refer to our Supported Services page.
Unfortunately it doesn't always go to plan! If you are having problems please email us at support@simpletelly.com and we will do our best to assist you.