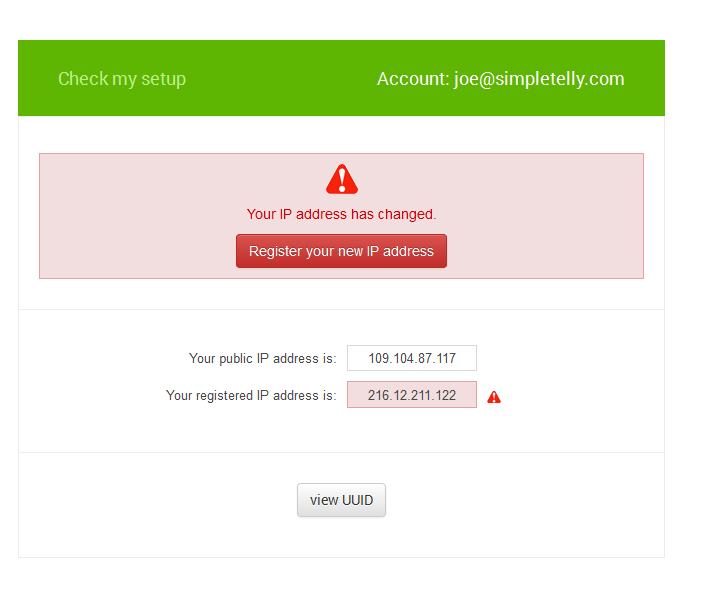
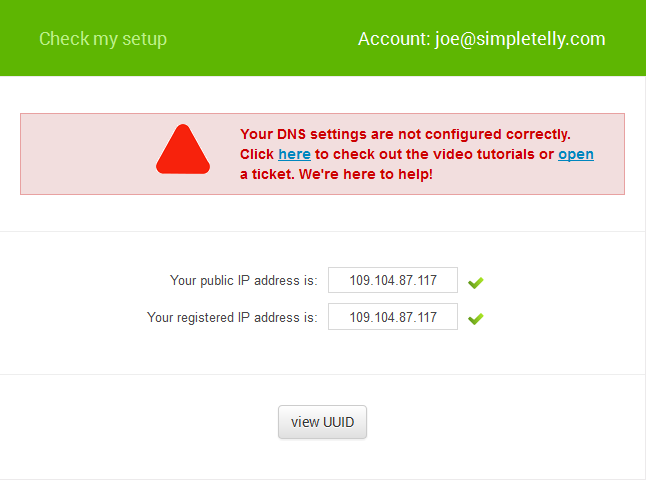
 If the registration is done from a computer browser, you will get this error on screen. You can disregard this as the DNS is set up on the console and you just need to ensure that the Registered IP address is the same as your Public IP address.
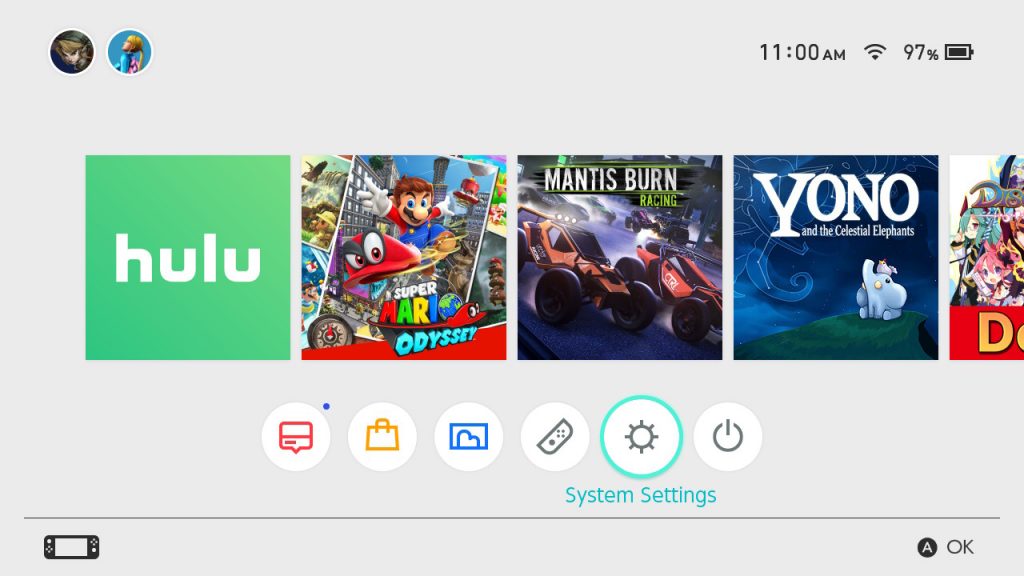
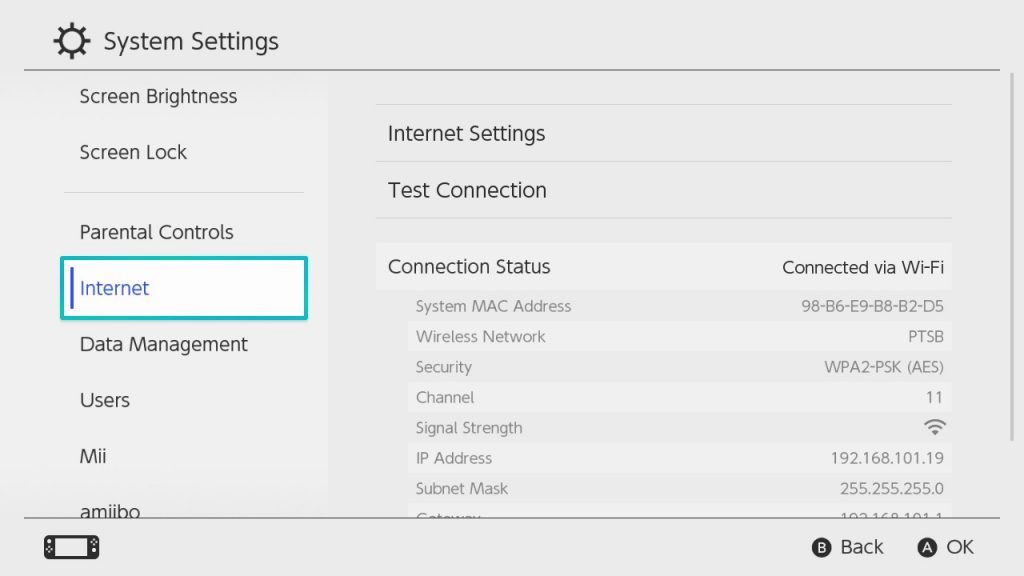
From the Main Menu, press down on the D-pad and scroll right until you find System Settings.
In the System Settings, scroll down to Internet and select Internet Settings.
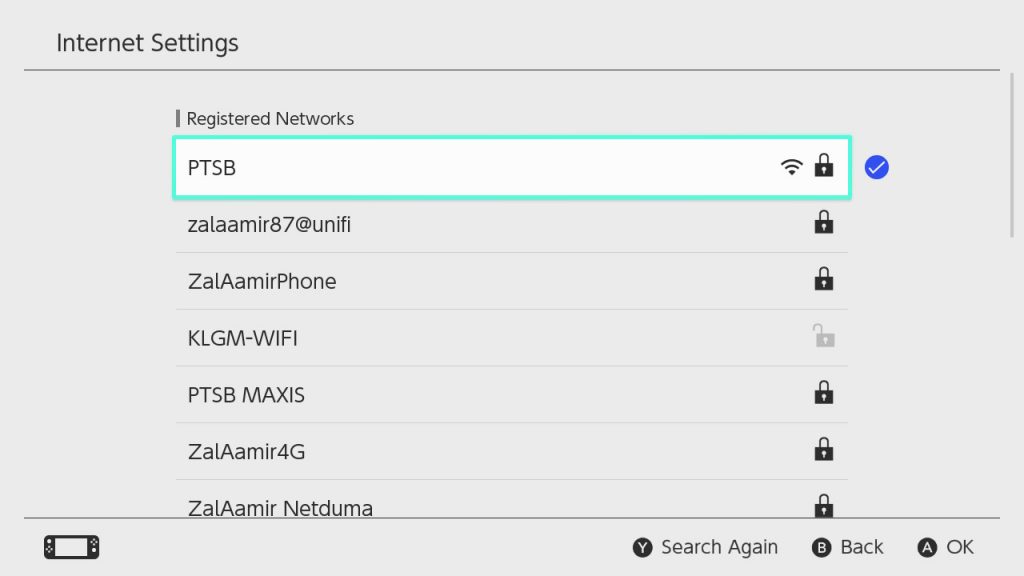
At the Wifi network selection menu, select the Wifi connection you'd like to connect to.
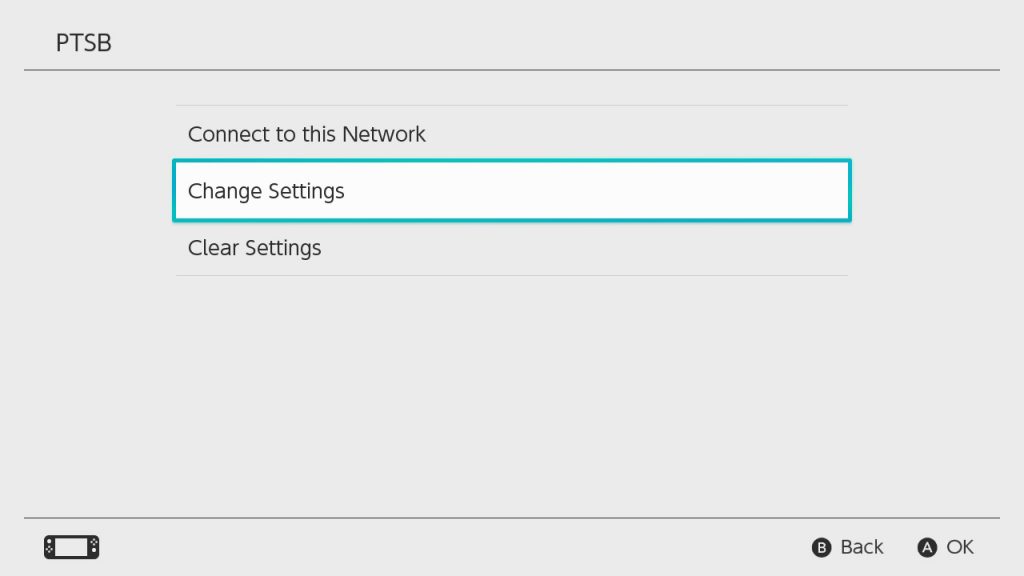
In the next screen, select Change Settings.
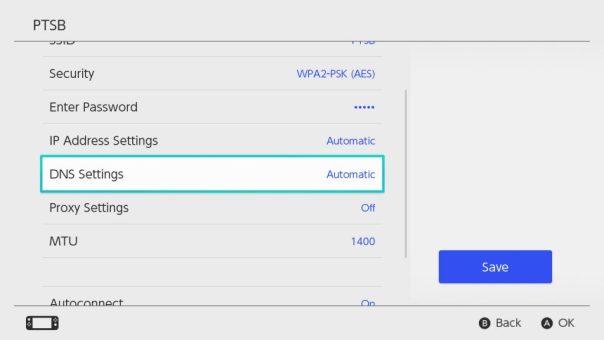
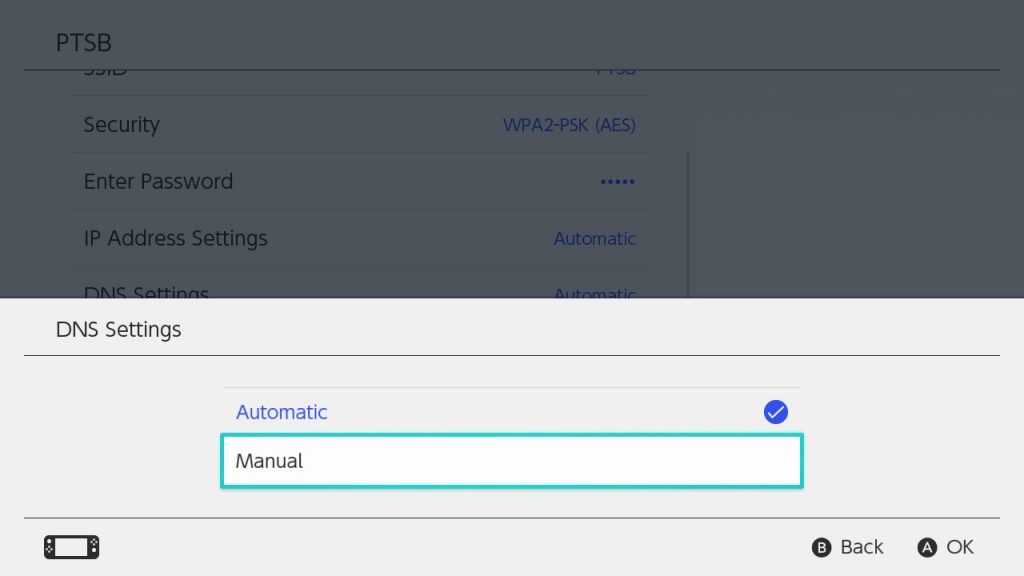
Next, scroll down until you see DNS Settings and select it.
Note: At this point it should state Automatic.
On the next screen, please select Manual.
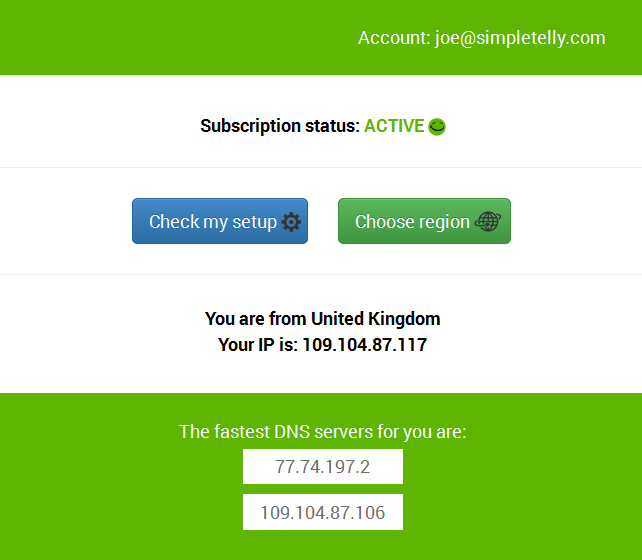
Next, please enter the two DNS server addresses shown on your browser earlier.
Note: Do not worry about following the Switch address format (000.000.000.000) as the Switch is smart enough to fill in the blanks where necessary.
For example, if your nearest DNS server address is 216.12.211.122 you can simply enter the address as that instead of having to follow the Switch format which is 216.012.211.122
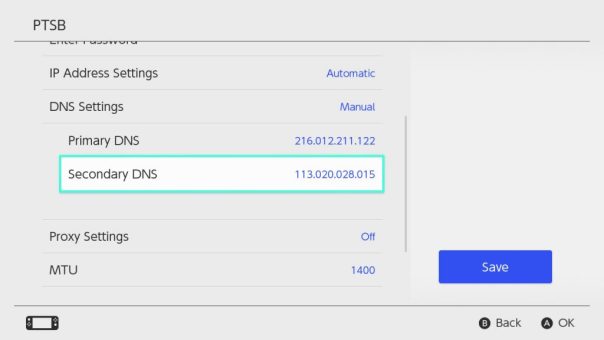
Once the settings have been added, please select Save.
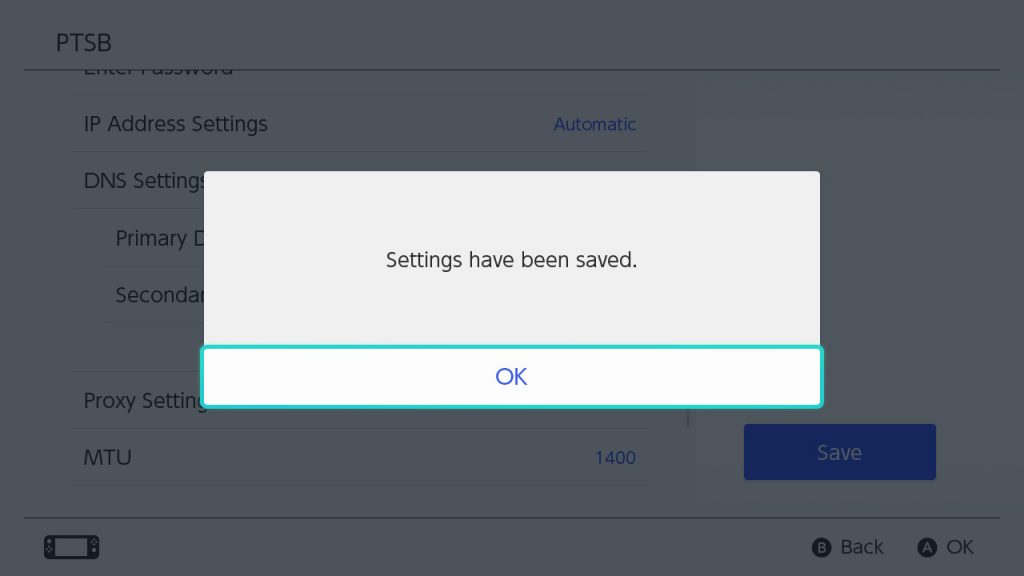
Finally, with the DNS addresses now added to your Nintendo Switch DNS settings, go back to the main menu and Stream it like you mean it!